Steps to implement the BADI:
Steps to implement the BADI:
-> Execute SE19.
-> Select the Classic BADI Radio button in the implementation block.
-> Provide BADI name (VENDOR_ADD_DATA).
-> Click on create implementation.
-> Provide implementation name (ZBBS_TEC_H_AI0). Enter.
-> Provide short description (Maintain key info in excel sheet).
-> Click on save. Enter.
-> Click on create enhancement implementation.
-> Provide the same implementation name (ZBBS_TEC_H_AI0).
-> Provide short description (Maintain key info in an excel sheet). Enter. Save in local object.
-> Select the implementation name. Enter. Click on interface tab.
-> Double click on CHECK_ALL_DATA method.
-> Click on signature.
-> Identify the input output parameters & implement the logic.
-> Save, check, activate the method.
-> Click on back. Save, check, activate the BADI.
TYPES : BEGIN OF TY_VEN,
LIFNR TYPE LFA1-LIFNR,
BUKRS TYPE LFB1-BUKRS,
KTOKK TYPE LFA1-KTOKK,
NAME1 TYPE LFA1-NAME1,
SORTL TYPE LFA1-SORTL,
STRAS TYPE LFA1-STRAS,
ORT01 TYPE LFA1-ORT01,
PSTLZ TYPE LFA1-PSTLZ,
CBY TYPE SYUNAME,
CDT TYPE SYDATUM,
END OF TY_VEN.
DATA : WA_VEN TYPE TY_VEN,
IT_VEN TYPE TABLE OF TY_VEN.
IF I_ACTIVITY = ‘H’.
WA_VEN-LIFNR = I_LFA1-LIFNR.
WA_VEN-BUKRS = I_LFB1-BUKRS.
WA_VEN-KTOKK = I_LFA1-KTOKK.
WA_VEN-NAME1 = I_LFA1-NAME1.
WA_VEN-SORTL = I_LFA1-SORTL.
WA_VEN-STRAS = I_LFA1-STRAS.
WA_VEN-ORT01 = I_LFA1-ORT01.
WA_VEN-PSTLZ = I_LFA1-PSTLZ.
WA_VEN-CBY = SY-UNAME.
WA_VEN-CDT = SY-DATUM.
APPEND WA_VEN TO IT_VEN.
CALL FUNCTION ‘GUI_DOWNLOAD’
EXPORTING
FILENAME = ‘D:\VDOWN.XLS’
APPEND = ‘X’
WRITE_FIELD_SEPARATOR = ‘X’
TABLES
DATA_TAB = IT_VEN.
REFRESH IT_VEN.
ENDIF.
Endmethod.
SAVE,CHECK,ACTIVATE The method
Click on back
SAVE,CHECK,ACTIVATE The BADI
Steps to identify the all the implementations of BADI:
Execute ‘SE18’.
-> Provide the BADI name (VENDOR_ADD_DATA).
-> Click on display. In the menu bar click on implementation -> Display.
-> Identify the all the implementations of BADI.
-> Yellow color BADIs are active and Blue color BADIs are inactive.
Scenario 2:
At the time of creating the vendor and customer, some times MDM people provide the incorrect recon account and cash management group. To avoid this we implement the BADI to preset the recon account and cash management group based on given company code.

Object: Implement the BADI to preset the Recon Account & cash management group based on the given company code
AKONT -> Recon Account
FDGRV -> Cash Management Group
When ever we are working with Preset BADIs then we must create one ‘Z’ table with preset fields and based on which we want to preset the values and later the table data is updated by functional people. Based on this table data we preset the values. In this object we must create one ‘Z’ table with the
following fields.
1. MANDT -> Client Input field
2. BUKRS -> Company code (Based on this, we preset the values)
3. AKONT -> Recon Account 4. FDGRV -> Cash Management

BADI Name: VENDOR_ADD_DATA
Method: PRESET_VALUES_CCODE
Implement the BADI through SE19.
DATA WA TYPE ZBB_S_TEC.
SELECT SINGLE * FROM ZBB_S_TEC INTO WA WHERE BUKRS = E_LFB1-BUKRS.
IF SY-SUBRC = 0.
E_LFB1-AKONT = WA-AKONT.
E_LFB1-FDGRV = WA-FDGRV.
ENDIF.
There are 4 types of BADI’s
1.Single use BADI
2.Multiple use BADI
3.Filter BADI
4.Custom BADI
Single use BADI:
We can implement this type of BADI’s only once if the BADI definition does not contains multiple use check box selected ,then the BADI is called single use BADI.
Multiple use BADI:
We can implement this type of BADI any number of times if the BADI definition contains multiple use checkbox selected, then the BADI is called multiple use BADI.
Filter BADI:
if want to implement the same BADI multiple types based on the condition, then we go for filter BADI
If the BADI definition contains filter-dependent checkbox is selected, then the BADI is called filter BADI
Note : Whenever, we are working with cost center and profit center related BADI’s, then we must provide filter type as controlling area
Note : Whenever, we are working with G/L account related BADI’s, then we must provide filter type as chart of account
Note : Whenever, we are working with vendor or customer screen BADI’s, then we must provide filter type as screen group.
Custom BADI:
Our own defined BADI’s are called custom BADI’s.
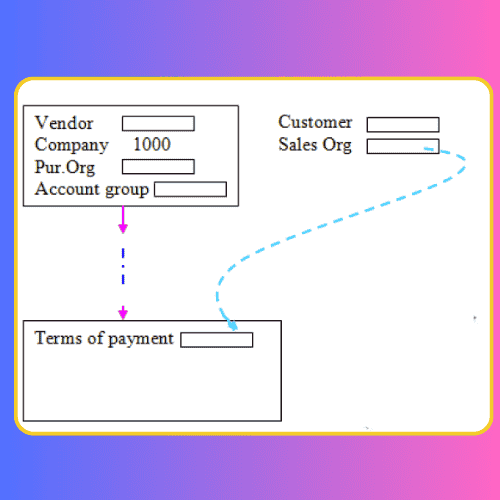
Scenario 3:At the time of creating the vendor and customer some times MDM people provide the invalid terms of payment to avoid this we implement the BADI to preset the terms of payment based on the purchase organization or sales organization.
Steps to identify the all the implementations of BADI:
-> Execute ‘SE18’.
-> Provide the BADI name (VENDOR_ADD_DATA).
-> Click on display. In the menu bar click on implementation -> Display.
-> Identify the all the implementations of BADI.
-> Yellow color BADI’s are active and Blue color BADI’s are inactive.
Object: Implement the BADI to preset terms of payment based o purchase organization. In this object we must create one ‘Z’ table with the following fields.
1. MANDT -> Client
2. EKORG -> Purchase organization (Input field)
3. ZTERM -> Terms of Payment (Preset field)
Table Name: (ZBB_S_TEC1)
BADI Name : VENDOR_ADD_DATA
Method : PRESET_VALUES_PORG

BADI Name: VENDOR_ADD_DATA
Method : PRESET_VALUES_PORG
Implement the BADI through SE19.
IF I_ACTIVITY = ‘H’.
DATA WA TYPE ZBB_S_TEC1.
SELECT SINGLE * FROM ZSP_O_PPD INTO WA WHERE EKORG = E_LFM1-EKORG.
IF SY-SUBRC = 0.
E_LFM1-ZTERM = WA-ZTERM.
ENDIF.
ENDIF.
Steps to work with screen BADI:
Step 1 : The additional screen fields are added to either standard DB table through append structure or create a ‘Z’ table with those fields
Step 2 : Based on the table fields, create the module pool program and sub screen
Step 3 :.Implement the BADI and method to attach the module pool program and sub screen to standard transaction
Object : Implement the BADI to add the following additional sub screen to customer transaction XD01
Sub screen2020

Step1 : Steps to add the additional screen fields to KNA1 standard DB table
Go to SE11
Select the radio button database table
Provide the table name (KNA1)
Click on display
Click on append structure

Provide the append structure name (ZBB_S_TE)
Click on create
Provide short description
Provide the components(field) and component types (Data element) and double click on data elements and create the data elements (All the steps must be saved in our own package )
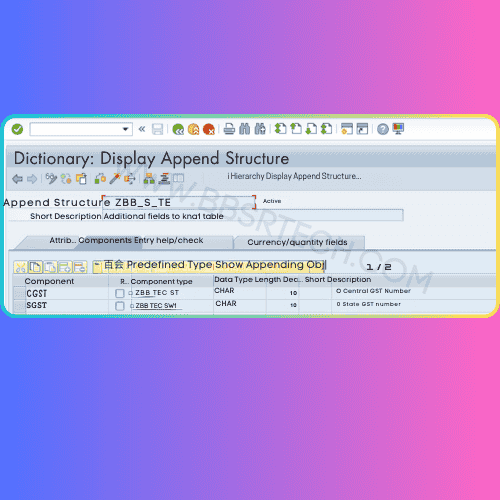
Save, check, activate the structure
Click on back and observe the additional fields in the table.
Step 2 : Steps to create the module pool program and sub screen based on table fields
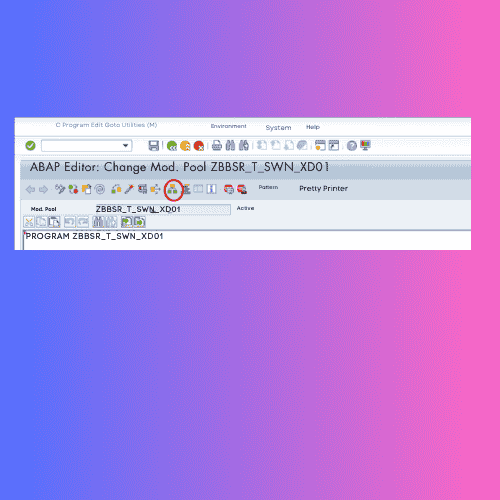
Go to SE38
Provide the program name (ZBBSR_T_SWN_XD01)
Click on create
Provide the title
Select the type is module pool program
Click on save
Click on display object list in application tool bar
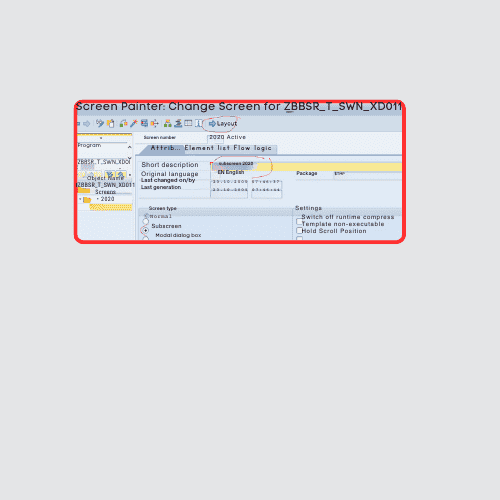
Select the program in left panel->Right click ->create ->Screen
Provide the screen number (2020)
Enter
Provide the short description
Select the radio button sub screen
Click on save
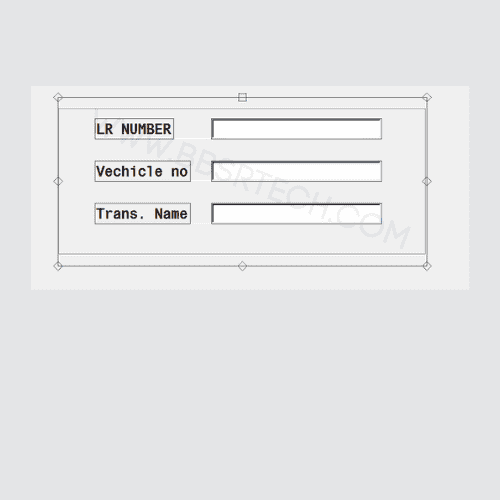
Click on layout
Click on dictionary and program fields icon and provide the table name (KNA1) click on enter
Select the our required fields and click on ok
Place the fields in the screen by left click
And draw the box
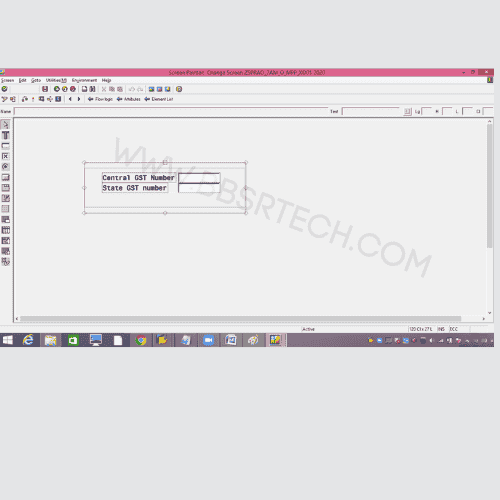
Click on save
Click on back
Double click on program in left side
Select the program in left side and right click->activate
STEP3 : Steps to attach the module pool program and sub screen to vendor/customer transaction
1. Create the screen group
2. Activate the screen group
3. Attach the module pool program and sub screen to screen group
Steps to create the screen group
Go to SPRO
Click on SAP Reference IMG in the application tool bar
Expand the logistics general
Expand the business partner
Expand the customer
Expand the control
Expand adoption of customer master data fields

Execute prepare modification-free enhancement of customer master record.

Click on change mode in the application tool bar
Click on new entries in the application tool bar
Provide the screen group and short description
Select the screen group and click on label tab pages in the left side
Provide the screen number and function code and short description
Save, back
Save, back
Steps to activate the screen group
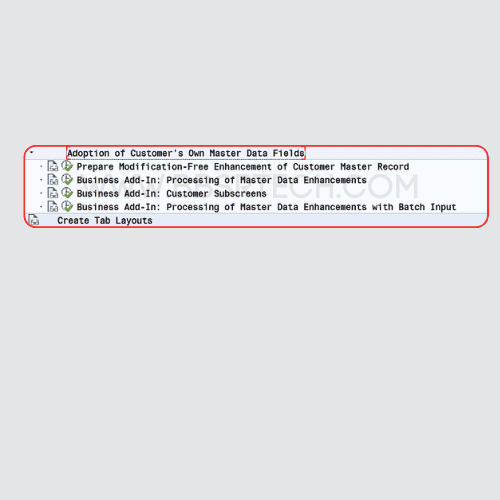
Execute Business add-in processing of master data enhancements
Select the any one of implementation
Click on create
Provide the implementation name (ZBB_S_TE2)
And implement the method as follows (CHECK_ADD_ON_ACTIVE)
method IF_EX_CUSTOMER_ADD_DATA~CHECK_ADD_ON_ACTIVE.
IF I_SCREEN_GROUP = ‘SG’.
E_ADD_ON_ACTIVE = ‘X’.
ENDIF.
endmethod.
Save, check, activate method
Click on back
Save, check, activate the BADI.
Click on back
Steps to attach the module pool program and sub screen to screen group
Execute the business add-in customer sub screen
Select the any one of the implementation
Click on create
Provide the implementation name (ZBB_S_TE3)
Provide short description
Click on attributes tab
Click on insert row (+button)
Provide the screen group name (SG)
Click on save
And implement the method as follows (GET_TAXI_SCREEN)
method IF_EX_CUSTOMER_ADD_DATA_CS~GET_TAXI_SCREEN.
IF I_TAXI_FCODE = ‘SGFC’.
E_SCREEN = ‘2020’.
E_PROGRAM = ‘ZBBST_TEC_O_MPP_XD01’.
E_HEADERSCREEN_LAYOUT = ‘ ‘.
ENDIF.
endmethod.
Save, check, Activate the method
Click on back
Save, check, activate the BADI.
Note : Now we execute XD01 and observe the additional screen in application tool bar
Save, check, Activate the method
Click on back
Save, check, activate the BADI
Note : Now we execute XD01 and observe the additional screen in application tool bar
OBJECT : Attach the following additional sub screen to MIGO transaction.
Sub screen 2020
Step 1: add the additional screen field to EKBE table
Step 2 : Create the module pool program and sub screen
Module pool program : ‘ZBBST_O_SWA_MIGO’
Su screen number : 2020
Step 3 : Implement the BADI and method to attach the module pool program and sub screen to MIGO tcode
BADI NAME : MB_MIGO_BADI
METHOD NAME : PBO_DETAIL
Implement this BADI and METHOD through SE19 as follows
method IF_EX_MB_MIGO_BADI~PBO_DETAIL.
E_CPROG = ‘ZBBST_O_SWA_MIGO’.
E_DYNNR = ‘2020’.
E_HEADING = ‘GR Additional info’.
endmethod.
Note : Now we execute MIGO Transaction and observe the additional screen in item level tab.
For Part 1 please click BADI in SAP ABAP: How to Implement and Configure Part 1
To learn more about SAP ABAP from SAP please click